

Welcome to Advanced Primate's Backpacking 101 guide. We’re so stoked that you’re here and seeking more knowledge about the outdoors. The benefits of taking in the natural world are many and every single one of them can be life changing in a positive way.
In its simplest form, backpacking is the combination of hiking and camping rolled into one. You head out to your campsite on foot and bring only what you can pack in (and back out) with you. It is a primitive experience that takes place in the wilderness. In the United States we’ve been gifted with wilderness lands and waterways that are both epic and plentiful, and in many ways the underpinning of American culture. It is where we’ve come from as humans and it is a place we should always be in touch with as individuals.
At Advanced Primate, we cherish our time with others and so for us backpacking is an awesome way to come together with our friends and family to create lasting memories. To find solitude in nature and to give us a place for contemplation.
For this guide we have sought the sage advice of an expert outdoorsman, Tim Smith. Tim has spent years in the backcountry as a professional land conservationist working in the Oregon and Washington Cascade Mountains as well as all over Idaho on contracts for land owners like the United States Forest Service and the Bureau of Land Management.
He has taught countless land conservation and outreach classes for teenagers where the goal was to teach young people how to not only work in the woods, but to conserve the land, and survive day to day. For much of this guide, you’ll be gaining wisdom from Tim gained through his many years spent outdoors.
What’s so great about backpacking?
The quiet. If you get out there, it’s very quiet. You can see beautiful views from most trailhead parking lots, but there is so much more to see beyond the lot. Backpacking makes you feel small. You’re tiny out there and there is something really wonderous about it all. It puts a lot of things into perspective.
When you return to society from a backpacking trip, everything that might normally bug you has the sound turned down. And what doesn’t matter slides. It’s therapeutic and helps solidify your purpose. Venturing into the backcountry allows you to experience life in its most authentic form. The rules of society melt away and the rules to survival are laid bare. The rules that you’re following are the rules that keep you alive and the ones that keep the wilderness safe.

Eight things to consider before your first trip
- Check the weather and fire conditions. Your best available resource is to check in with the local forest ranger. For that, head over to National Forest Service to find the ranger station and phone number for the region you’ll be visiting. Two major benefits of talking with the ranger are that you can ask them directly whether or not you can have a ringed fire at that time of year and also if there are any nearby forest fires you should be aware of. These folks have more intimate knowledge than the rest of the internet and nothing ruins a trip like starting a fire then finding out by getting a ticket that a fire is not permitted. Tim speaks from experience on that one.
- Always consider the elevation. In Idaho for example, a good rule of thumb is that for every 1000’ of elevation the temperature drops about 5-7 degrees and that gets amplified at nighttime.
- Go somewhere you’re familiar with, or if you're new to the area ask around. Find a trusted local source and seek their guidance for a good first-time backpacking area. That way if you do make a mistake or if someone becomes injured, you’ll have a better chance of knowing where you are and how to get out.
- Go with someone else. Never go alone on your first time. Preferably, choose someone with camping experience although this isn’t a requirement. There are a myriad of reasons for going in pairs (or more), but the best reason is that if something goes wrong and someone gets hurt, you have a healthy body who can go for help. And this brings us to the first Big Backpacking Rule of Thumb: always build in redundancy.
- Plan your first trip for a single night. Go in, stay the night, and get back out. This gives you the opportunity to reflect on the trip, what went well, what didn’t go so well. Get a quick win and perform a lessons learned exercise afterwards. Maybe you find out you don’t even like your backpacking partner all that much. This can and does happen believe it or not! What could be worse than being stuck out in the wilderness with somebody you don’t like for longer than necessary? On an overnighter you won’t have the pressure of conserving food/water either. Having to think about making things work for longer than one night. Set the bar low to help ensure your first trip is successful.
- Decide where you want to camp. If you’re in the national forest and you’re not in a campground it is legal to camp anywhere you want to. So long as it’s not an active logging site. For obvious reasons, but if you need a couple of tangible ones so you can explain to somebody else: it is dangerous and the loggers will chase you off!
- Always tell someone who isn’t going when you’re leaving, where you’re going, and when you’ll be back. Don’t forget to give them the contact information for that closest ranger station. If you go missing, the latter can mean the difference between life and death. If you don’t come back when you’re supposed to, your friends/family can check in with the ranger station and get the word out. At that point, hours save lives.
- Last, but certainly not least: make sure you’re in good enough physical condition for this type of journey. If you’re new to hiking, consider taking in a few 1-2 hour day hikes prior to leveling up to backpacking. We could spend a lot of time on this particular subject, but frankly, we aren’t certified fitness professionals and you know your body better than we do. Use your best judgement in determining your fitness level compared to the trip you’ve decided to take. And with that, we’ll move on to the fun part.

Rounding up your backpacking equipment
- The pack itself is probably the first thing you’ll think of and rightfully so, the word backpack is literally 2/3rds of the word backpacking. Backcountry backpacks are actually really personal. Different brands will fit you differently, just like shoes. The most important thing you can do during backpack selection is try on different backpacks to find what fits you best. Don't worry, you're safe trying a backpack from AP because of our generous free returns policy. How long do you need to wear a potential pack before you know if it’s right for you? Not that long actually. Put it on, put some weight in it (maybe 20 pounds), and see how you like it. Another consideration is how long are you planning to wear it for? Is it going to be 1-2 hours at a time or 6-8 hours? Probably the former for your first go and somewhere in the middle for subsequent adventures. Your backcountry backpack is a long-term investment however so you should look for something you will enjoy beyond your first outing or two. As you adventure with your backpack more your relationship with your pack will grow. A good pack can last you upwards of 10 years and if you made a good choice when you picked it, you’ll genuinely mourn it’s loss when it finally gives out. Let’s talk a bit more about ideal fit and the right compartment size.
- About fit: you want to look for a pack with three key features: a hip belt, chest strap, and load distribution straps. Your hip belt’s primary function is to take the weight of the pack off your shoulders and put it squarely on your hips which is the most comfortable position for extended carry. Once your pack is cinched down correctly, the objective is to have about 90% of the weight sitting on your hips. An added benefit is that your pack won’t jiggle side to side as you walk. Your sternum strap’s primary function serves to keep the load of your pack forward as well as keeping your shoulder straps from spreading (wider) on your chest as you hike. A secondary benefit is they also keep the pack more firmly held to your torso, minimizing friction against your movement, and reducing the amount of effort you have to expend ‘fighting your pack’. The further back your backpack sits, the more it’s pulling against you. Most people prefer to hike at a forward lean so load balancing straps are meant to pull the back of your pack up or down (center of gravity) on your back. This can change every hour as the contents settle while you hike, so it’s important to be able to adjust the center of your pack’s gravity as often as you see fit. Stop as often as you need to, ask yourself “am I fighting against my pack?”, and adjust your load balancers accordingly.
- About size: anything over 40L will work for ultra-light overnight excursion and you can get away with a 65L pack for multiple nights. For rookie reference, if you’re used to a backpack for work or commuting, 40L is a bigger pack than you have probably ever used. While a 65L is a dedicated backpacking pack, a 40L is a great day hiking pack and makes a great beginner pack. If you’re somebody who likes to go big, read this: for your first pack, do not talk yourself into anything more than 70(ish)L because you’re going to want to put more stuff in there than you need. And anything more than you need is just wasting energy.
- Light source – headlamps are great for lighting needs because they give you a hands-free experience; advancedprimate.com has a few that we recommend, take a look here. You can also bring a small flashlight or lantern if available pack space allows.
- Map – have a paper map of the area, do not think you can just use your cell phone. Always build in redundancy, especially when one of your sources is technology related. When you talk to the forest service ranger make sure that you’re getting a map of the area that you’re going to be in. Specifically, a map of the mountains, trails, and streams around the area. Familiarize yourself with the map’s legend, the scale, the topography (topographic lines and the relative spacing regarding elevation represented). Pro-tip: take a picture with your phone of the map at the trailhead as a backup, backup.
- Compass – always have a compass (besides your phone) so you can find direction. We offer a great base plate compass from Brunton that’ll work well with your paper map.
- Fire source – bring a lighter, waterproof matches, or a fire striker. 2 out of 3 of these is ideal. Why? Always make sure you have a built-in redundancy.

- Shelter – Not that you’d want to pack it in and back out with you anyway, but do not bring an 8-person tent, it will not keep your body heat close to you. If body heat retention is most important to you the smallest shelter option is a bivey sack, which is essentially a sarcophagus for a single person. If you’re claustrophobic and want something a little bigger, we recommend a 3-person tent. It will fit you and your pack comfortably and provide adequate body heat retention. The big advantage that a tent would have over a bivey sack is that you don’t have to change clothes in the rain, a bivey sack does not afford that luxury. Another option, If you want to go really light, would be a tarp shelter (picture a string with a tarp draped over it in a triangle tent shape). If it’s your first time out a tarp shelter might make you feel a little exposed, which may make it harder to sleep. Your brain is already going to be listening to everything around you and from experience we can you that an animal the size of your fist is going to sound like a bear when it’s dark. If there are no walls around you, that can really keep you up at night when you’re new to the woods. We’d recommend an enclosed 3-person tent for your first time (for no more than two people) and even if you don’t think it’s going to rain, put the rain shell on. Just do it. Weather changes fast and nobody likes waking up in the middle of the night with everything in their tent soaked, even when you swore it wasn’t going to rain.
- Sleeping bag – The main thing to pay attention to here is your bag’s temperature rating. If you’re doing summer camping, which is a perfect time to go for your first time, a 40-60 degree bag should be fine. In Idaho we typically use a 40 degree bag for most of the summer. For shoulder seasons like fall or spring, we’d recommend a 0 to -6 degree bag.
- Pad – A lot of people think that a pad is for comfort and that simply isn’t true. A pad is intended to insulate you against the ground. The Earth is an enormous heatsink and it is always colder than your body temperature. You need an insulator between you and the ground and that goes for sleeping in a hammock too. You’ll want a pad to put underneath you inside your hammock.
- When it comes to pad selection there are two types: solid and inflatable. Solid pads tend to be bulkier but they’re durable and great for their intended purpose. Inflatable pads are just as good, but can get punctured so if you choose one we’d recommend packing it inside of your sleeping bag for protection in transit. You see there are no mono-taskers in the woods. Everything serves more than one purpose, even your sleeping bag. If you like the idea of hammock camping, check out our awesome selection of hammocks from Trek Light Gear.
- Food – You want to bring high calorie food. Chocolate and nuts are great foods to bring. Do not neglect salty snacks. You’re going to be sweating a lot throughout the day and if you’re not replacing that salt, you’re going to start out by getting a really bad headache and it goes downhill from there. You’re going to be drinking liters and liters of water because you’re going to be hot so you also need something salty replace the losses there.

- Water – You should always look to camp near a stream, river or lake. The advantages for camping near water stretch beyond the obvious access to water as well. The sound of flowing water is something that most find to be pleasant and it can help drown out (no pun intended) those critter noises that might otherwise keep you awake at night. Also more trees tend to grow around water and more trees mean more shade, more places to tie up a hammock or a shelter, and more opportunities to find kindling.
- The list goes on, but for the purpose of hydration needs while backpacking, camp near water so you have a source of water to filter and refill your vessels from. Yes vessels, plural. We find it is preferable to have a reservoir (water bladder) for the hydration needs during the trek, preferably one with a bite-piece so it’s easy to drink from while moving. When at the camp site a packable water bottle that can lay flat or be rolled up in your pack when not in use, like this one from Matador, is excellent for the occasion. Carrying a bagpipe-shaped reservoir around the campsite is both awkward and dangerous (for the reservoir), especially if you’ve stoked a fire. One burn or puncture to the bladder itself and your hydration container for the way back out is kaput. Always build in a redundancy. And don’t forget the water filter! You can fill your reservoir at the car or your house before you head out, but after that it is all filtered, all the time. Pro tip- you can boost the power of your filtered water by bringing a few powdered Gatorade packs along for the trip to add flavor and recharge electrolytes.
- Bear canister – A bear canister is as much about protecting the people from the bears as it is the bears from the people. Wild animals that become too acclimated to humans often must be destroyed. That’s a very sad thing and something that can be easily avoided with the proper human decision making. Bear cannisters or a bear hang are two great options to keep bears and other unwanted guests away. A cannister locks in the smells so they don’t attract unwanted guests and a hang suspends those smells above the ground so they can’t be reached. Those smells don’t just pertain to actual food, but also things like your lip balm and your toiletries. These things also smell like food to an animal. In fact, anything that isn’t dirt or trees smells like food to an animal.

- First Aid Kit – Always bring a first aid kit. It doesn’t need to fill a quarter of your pack, but it does need to carry a few essentials. Expect blisters on your feet if you haven’t hiked for an extended period recently; seasoned backpackers consider blisters to be part of experience. So, a kit with moleskin or something to put over your blister is a definite must. Also have athletic tape, burn cream, a dressing for scratches or burns, and antiseptic or isopropyl alcohol to clean burns or wounds. If you drink alcohol, whiskey or tequila would work in a pinch, but you’re going to want to drink that so we would still recommend the former. Also bring aspirin or ibuprofen and a small pocket guide to help you address any first aid situations in a step by step fashion. Nobody is immune to panic in stressful situations so a step by step guide can be handy for any level of backpacker. Even the most experienced hikers would agree.
- (Preemptive) Defense – In all his time in the wilderness, Smith has never run into a bear in a negative way. When he has encountered them, it’s usually a bear that didn’t hear him coming, but they’re generally giant racoons and will run away. You don’t want to mess with them and they don’t want to mess with you. Unless you’ve made a mistake such as not properly storing your food. If a bear wants your food and is in your camp, bear spray is handy. Loud noises such as shouting or banging two rocks together are great options. Unless it’s a grizzly and then bear spray is really your friend, also play dead, but dealing with a grizzly bear encounter is a separate guide for another day. Smith has never run into a grizzly bear in his time in the wilderness and he prefers to keep it that way.
- A Knife – Do yourself a favor and don’t bring an overly complex knife. You can bring a Leatherman if you’d like, but don’t bring something that has an overabundance of tools on a single axle. Tim prefers a folding knife that allows him to extend the blade with one hand using only his thumb. If it can attach to a carabiner so you don’t lose it, that’s an added benefit. You can check out our selection of knives here.
- Food Prep/ Consumption – Fuel cannister, packable cooking equipment and a mess kit.
- Trash bag – bring one so you don’t have to put all of your trash directly inside your backpack on the way out.

Setting Up Camp
“Setting up camp is always something that sounds self-explanatory. That is until you inadvertently screw something up.” – Tim Smith
- Pitching your tent or shelter - Look for level ground that isn’t bumpy. Clear the way of any rocks, sticks or other pokey objects that might wake you up in the middle of the night. Keep an eye out for a place that may have already been used by someone before you. Finding an existing tent spot is good for a couple of reasons: you don’t have to do any extra work as some of the clearing has already been done for you and also reuse minimizes your impact to the environment. No need to clear out two spots for people to sleep if one does the job just fine. This brings us to the second Big Rule of Backpacking: minimize your impact. It’s also a good idea to look for dead trees that are still standing. Nobody has time for dead trees falling on them in their sleep. Nice open sky is usually ideal. One last thing, if the best available space is on a bit of slope, make sure your head is up hill from your feet when you go to sleep. Most people get this, but just in case.
- Setting up your fire area – Assuming you’ve checked with the ranger and it’s clear to do so in the time of year you are camping and the area you’re in, look for an existing fire ring that’s been set up by previous backpackers. If you find one, use the ring that’s already there. This helps to minimize your impact. If there is not existing fire ring, you should set one up before starting your fire, here is how:
- Clear the area: clear out at least a 10’ area around your fire pit and make sure there are no low hanging branches or trees directly over the top of it. By clearing, we mean remove twigs, branches, brush or anything else flammable from the 10’ space.
- Dig your pit: this step is optional, but ideal in order to keep the flames and heat from the fire better contained. Make the pit as big around as you want to your fire to be, 3-4’ is probably plenty and go a least 1.5’ deep if you’re going to undertake the digging effort. If you do plan to do this step, you may wish to bring a collapsible camping shovel to assist. An added benefit of digging a pit is that you may find rocks that are helpful in the next step.
- Build your ring: whether or not you dig a pit, you definitely want to outline your fire with a ring of rocks. The bigger/ taller the rocks can be, the better. You want them at least large enough so that you can rest your fire poker or marshmallow stick on top. The only other thing to remember is that rocks can explode if they reach high enough internal temperatures so look for rocks that are dry, hard, and have a consistent color around the outside for use in your ring. Stay away from limestones and chalks since your fire can break them down.
- Starting your fire – Most of us have started a campfire at some point or at least seen it done, but in case you aren’t familiar, we’ll cover the basics here. There are three things you’re going to need to make it happen: tinder (lint, shavings, cardboard, newspaper, etc.) to help you get that first flame rolling, kindling (small sticks or twigs) to build flames, and firewood (the main fuel). You can stack the firewood in the traditional teepee shape or in separated pairs with each layer rotated 90 degrees from the pair they’re on top of, 2-3 rows high is plenty (think Lincoln Logs if you remember those from your childhood). Shove your kindling at the bottom of the firewood stack in the center and set your tinder next to the kindling. If you brought a lighter, waterproof matches, or a fire striker now is the time to grab it and you’ll be enjoying your fire in no time.

- Putting out a fire – Step 1 drown the campfire with water. You probably won’t have a bucket but use the largest water container you can muster and dump lots of water on the fire. Step 2 is to stir the campfire to make sure everything gets wet. Step 3, douse the fire with water again. Step 4 touch the coals to make sure there is no heat left. Repeat the previous steps if any heat remains until the fire and the rocks in the fire ring are cool to the touch. Finally, check the area around your campfire for any sparks that may have found their way outside of the fire ring. It might seem like a small thing with low odds of occurrence, but it only takes one spark to start a forest fire.
- Defecation – While this is probably everybody’s least favorite thing to talk about, it’s an important part of minimizing your impact to the environment while you’re in the backcountry. To be clear, what we’re talking about here is going number two in the woods, we’ll leave peeing to your previous years of experience. If you’re lacking in that experience, the same rules we’re about to cover apply.
- Make sure you’re 200’ from the nearest water source. This is a good distance, 2/3rds of a football field to be exact. Next, you’ll want to dig a hole, commonly referred to in the land conservation community as a “cat hole”. Dig your cat hole about as deep as you can go, without digging a trench. If It is just you or you’re just there for the night, a single use hole is probably fine. If you’re with a larger group or you’ll be out there for multiple nights, digging a latrine is more appropriate. This helps to minimize your impact. To be sure, animals will dig this up once you’re gone, but better to have them digging one hole rather than multiples. What about toilet paper? Don’t bring toilet paper unless you have a medical reason to bring it. If you do bring it, make sure you pack it out. Do not bury it, it doesn’t belong out there. Bring a plastic Ziplock bag and pack it out with you. If you’ve grown accustomed to your TP over the years like many have, don’t fret, there are many suitable alternatives provided to us by mother nature. We’ll just list the top three here.

- Leaves – look for broad leaves with prominent ridges (veins). Less dry leaves are also better as you might infer.
- Flat rocks – You’ll want to look for a nice palm sized angular rock. If you can find something in the granite variety or a basalt, those work really well. You can bury them when you’re done or if you’re in a boulder field where digging isn’t an option, just leave them on top of a nice flat boulder.
- Pinecone – the direction of the pinecone is important, we’ll let you guess which way is best. Douglas Fir pinecones work quite well (they are plentiful in the pacific northwest) as they are smaller in size and softer than some other varieties out there.
Cleaning up after yourself
Leave no trace – while there are seven official principles to Leave No Trace that we’d encourage you to review, we’ll cover the basics here to keep you in line with best practices. According to Smith, a good way to clean up after yourself if you’re with a group of friends is to form a line standing at arms-length from one another and walk off your camp site in a grid. Walk back and forth looking for anything that may have dropped, scuffed or discarded on accident and deposit it in your trash bag. A good rule of thumb is to take anything out with you that doesn’t belong, even if somebody else who came before you left it. When you’re done it’s time to hike back out.
You made it! Time for a victory lap
What do you do once you’ve completed your first backpacking trip or any backpacking trip for that matter?
- Celebrate with FOOD – As Tim Smith put it, “a simple rule of thumb here is to follow your joy.” It might be the greasiest hamburger that you can find. Local gourmet is a great choice, but if you have to do a chain of some type, Five Guys Burgers and Fries or In and Out are strong contenders. Five Guys does source their amazing fries from Idaho after all. Guilt food is not a concern after a you complete a backpacking trip. If you can’t find a burger, maybe look for a scone the size of your head, with a big ole side of bacon. “It sounds awesome and that’s because it is”, says Smith.

Well there you have it folks. You’ve enjoyed a great time outdoors, expanded your horizons both literally and figuratively, you’ve left it better than you’ve found it, perhaps wiped your hiney with a pinecone for the first time, and made some amazing new memories in the process.
If you’re new to the adventure that is backpacking, we welcome you to the experience. If you have any follow up questions, please let us know in the comments below. An advancedprimate.com representative or maybe even Tim Smith himself will get back to you shortly with a response!
And if you’re interested in becoming a land conservationist yourself there are many volunteer options available, no matter where you live in the world. A good place to get started if you live in the U.S. is here. Cheers and see you out there!
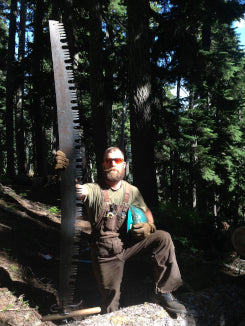
Advanced Primate's resident outdoors expert Tim Smith posing next to his trustee crosscut saw during his time as a land conservationist.


